Example: Creating a Widget
|
This shows how to create METER and SLIDER widgets using the process outlined in
Steps to Create Widgets. When this program is run, you can move the SLIDER button with the mouse and the METER widget will indicate the SLIDER value.
Step 1: Create METER and SLIDER Widgets
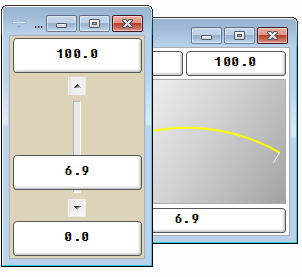
The following lines create a SLIDER widget and a METER widget and assign a
background color of white to the METER widget. (The SLIDER widget uses default
colors.) The LOOP and END LOOP statements are added so that the widgets do
not disappear when the program .runs A typical display for this program follows.
Since the SLIDER widget was generated last in the program, the SLIDER widget
appears on top of the METER widget.
10 ASSIGN @Meter TO WIDGET "METER"
20 ASSIGN @Slider TO WIDGET "SLIDER"
30 CONTROL @Meter;SET ("BACKGROUND":1)
40 LOOP
50 END LOOP
60 END
Step 2: Change Widget Attributes
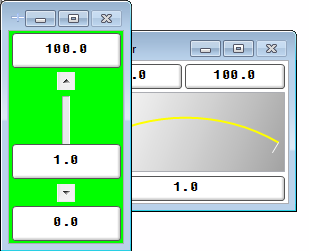
Since SLIDER was the last widget generated, it appears on top of the METER widget.
To reposition the SLIDER widget and the METER widget, we will modify the program
by adding the positioning attributes "X" and "Y" to each widget so that both widgets are
fully visible. In addition, we will change the SLIDER widget background to green.
A typical display for this modified program follows.
10 ASSIGN @Meter TO WIDGET "METER"
20 ASSIGN @Slider TO WIDGET "SLIDER"
30 CONTROL @Slider;SET ("X":0,"Y":0,"BACKGROUND":4)
40 CONTROL @Meter;SET ("X":150,"BACKGROUND":1)
50 LOOP
60 END LOOP
70 END
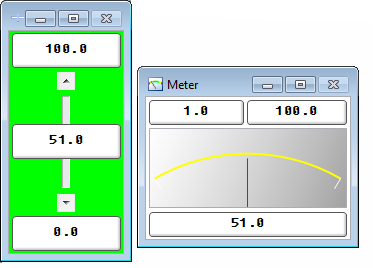
Step 3: Query Attributes and Add Event-Initiated Branching
SLIDER widget
VALUE attribute value with the
STATUS command. A typical
display for the modified program follows.
Run this program and select the SLIDER button with the mouse. Move the SLIDER
control up and down and notice that the METER will indicate the SLIDER value.
10 ASSIGN @Meter TO WIDGET "METER"
20 ASSIGN @Slider TO WIDGET "SLIDER"
30 CONTROL @Slider;SET ("X":0,"Y":0,"BACKGROUND":4)
40 CONTROL @Meter;SET ("X":150,"BACKGROUND":1)
50 ON EVENT @Slider,"CHANGED" GOSUB Event_handler
60 LOOP
70 WAIT FOR EVENT
80 END LOOP
90 !
100 Event_handler: !
110 STATUS @Slider;RETURN ("VALUE":Value)
120 CONTROL @Meter;SET ("VALUE":Value)
130 RETURN
140 END
For this program, line 50 calls subroutine Event_handler when the event CHANGED
occurs for the SLIDER widget. The CHANGED event is generated every time the user
changes the VALUE attribute by clicking on the arrows or in the trough or by clicking
and dragging the slider.
For the Event_handler subroutine, the current VALUE of the SLIDER widget is returned
by the STATUS command RETURN option, and is entered into the METER widget
VALUE attribute with the CONTROL command SET option. Thus, when you move the
SLIDER control up and down, the METER widget will indicate the SLIDER widget value.
Lines 60 through 80 continuously loop the program until the event CHANGED occurs
for the SLIDER widget. When WAIT FOR EVENT is included, it allows the computer to
do other things while waiting for the event to happen. This is important so as not to waste
CPU resources that could be used for other tasks.